

I came across Mama Pea over on peas in a pod who has an amazing step by step tutorial - check it out here. It was inspired by Vicki Walker of Expert Village who has several videos on you tube. I also found a tutorial about pillowcases on Christine's blog - from an igloo.
I took a look at all the available inspiration (pinterest etc) and decided to follow "Mama Pea's" measurements and got started.
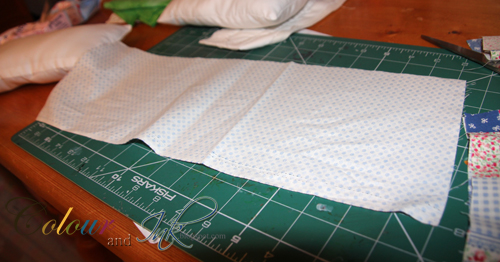
Now before you decide this post isn't for you..... I don't have any fancy gadgets i.e. a rotary cutter or a self healing mat big enough to use to cut material (I used my Fiskars 17x11 mat), or one of those wonderful quilters rulers or a quilting foot for my little sewing machine or any knowledge of patchworking!
So armed with my Fiskars scissors (featured above in the first photo), a school ruler, pins and determination I set to work.
So armed with my Fiskars scissors (featured above in the first photo), a school ruler, pins and determination I set to work.
I should mention that before this the only thing my sewing machine had actually sewn was paper!!!!!
Okay... background picture painted!!!

I cut templates from newspaper - 21 inches x 13 inches (folded) or 21 x 26 (open). I wanted to be able to make the best use of my fabric and make sure I didn't mess up!

I cut my top fabric, middle layer - fleece material and backing fabric using this template and then pinned them together at intervals.

I then stitching horizontal lines across the layers (you may see the pins are still in place).

I then rounded the corner of the layers (I used a chocolate lid as my template!).

Pin the bias binding on the top half of the sleeping bag pulling at the corners to create a rounded corner.

Machine stitch - then unpin and hand stitch the bias binding on the back/inside.

The next step is to put the bias binding over the two layers of sleeping bag (basically "sandwiching it together"!). Don't you just love my technical terminology!!!!

I wasn't too confident at this so I tacked the bias binding front and back with white thread so I knew that I had secured it on the back as I machine stitched.

I then added a button where the bias binding joins - you could add a bow if you wanted. I put my Fiskars scissors next to the sleeping bag so that you can get an idea of scale.
For the pillow
I worked out my dimension (10 inches by 6.5/7 inches). I used a long piece of fabric (20 inches by 6.5 inches) as that was what my scrap was! I then cut two pieces to create the edge/open end of the pillow.

I pinned the edging with wrong sides facing.

Below are both pieces reading for machine stitching.

I then placed them right side to right side and machine stitched.

When turned and pressed I then ran another line of stitching on top.


I had already made an insert for the pillow using some cotton scraps (read hubby's old shirt!) - filled with toy stuffing and top stitched the end closed.
 I got so proficient! I made a second one in red!.


Two sleeping Bags and pillows ready for gifting!


9 comments:
Oh wow, they are gorgeous, love the fabric. Thanks for the tutorial and I'm going to try making one of these!
what lovely gifts and I'm sure there are two young ones extremely excited to have these.
wow they are fab!! Hugs Juls
These are fab Deirdre! I love them! xx
Fantastic job, Deirdre - so neat and perfect. I know a few papercrafters who've been seduced by fabric and now sew all the time - be careful!!!
Julie xxx
Fantastic Deirdre!! Working in miniature sizes can be so challenging, but you certainly are a master! Your pillow/sleeping bags sets for dolls are adorable.
Absolutely adorable gifts Deirdre! They look fantastic :)
Amazing sewing project!!!
Oh, my gosh! They are so cute Dierdre! I love them! Well done! You did a great job! I'm really impressed. I never know how to sew on that premade bias. Isn't that funny? I always make my own, so I have trouble with the premade stuff. They way you did it makes so much more sense than how I did it. Thanks for that tip! And thanks for linking back. Appreciate it. I feel like making some more of these now. They are pretty fun to make, aren't they?! Hope you had a great holiday!
Post a Comment